In this article, we will upload a file to cloud storage and download it to serve it from our nestJS api.
Prerequisites:
Create a bucket
To create a bucket:
Open a terminal window. Use the gsutil mb command and a unique name to create a bucket:
$ gsutil mb -b on -l us-east1 gs://my-awesome-bucket/
This uses a bucket named “my-awesome-bucket.” You must choose your own, globally-unique, bucket name. For more information refer docs
Setting up service account
The first thing, we need to set up our service account, so that github has required permission to access the cloud storage.
Login to google console and navigate to IAM
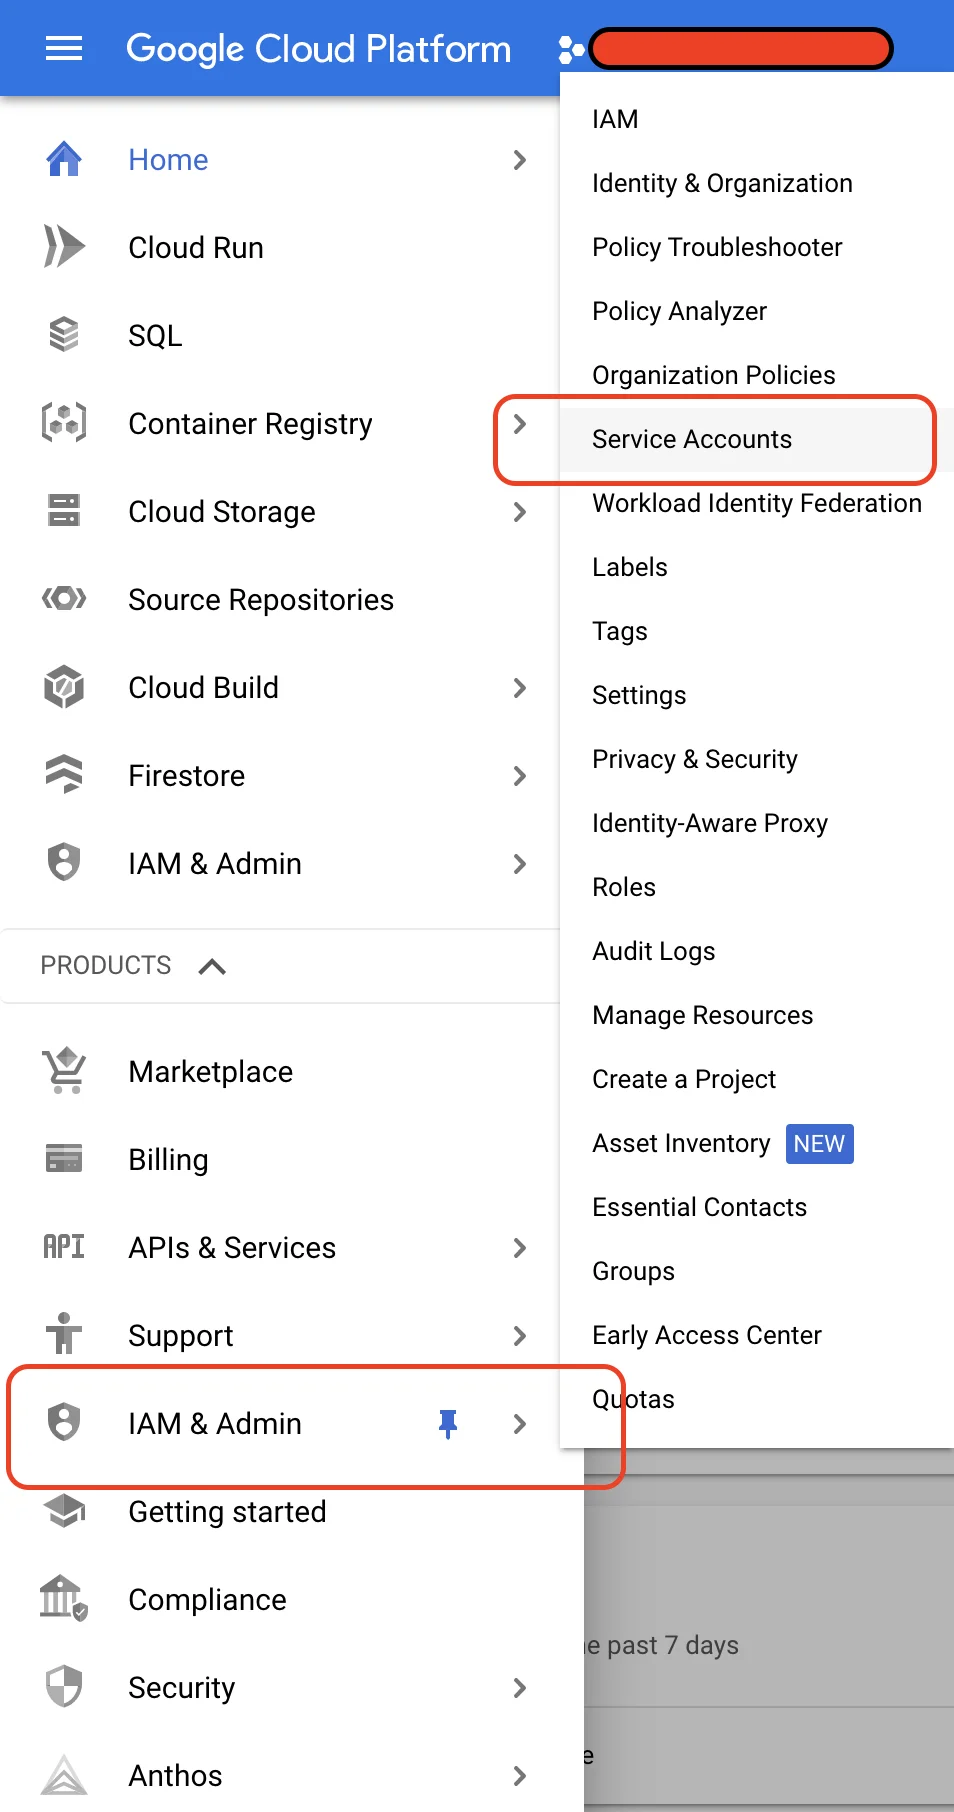
You need to add Storage Admin permission for publishing artifacts (optionally you can provide Cloud Run Service Agent for
cloud run deployments)
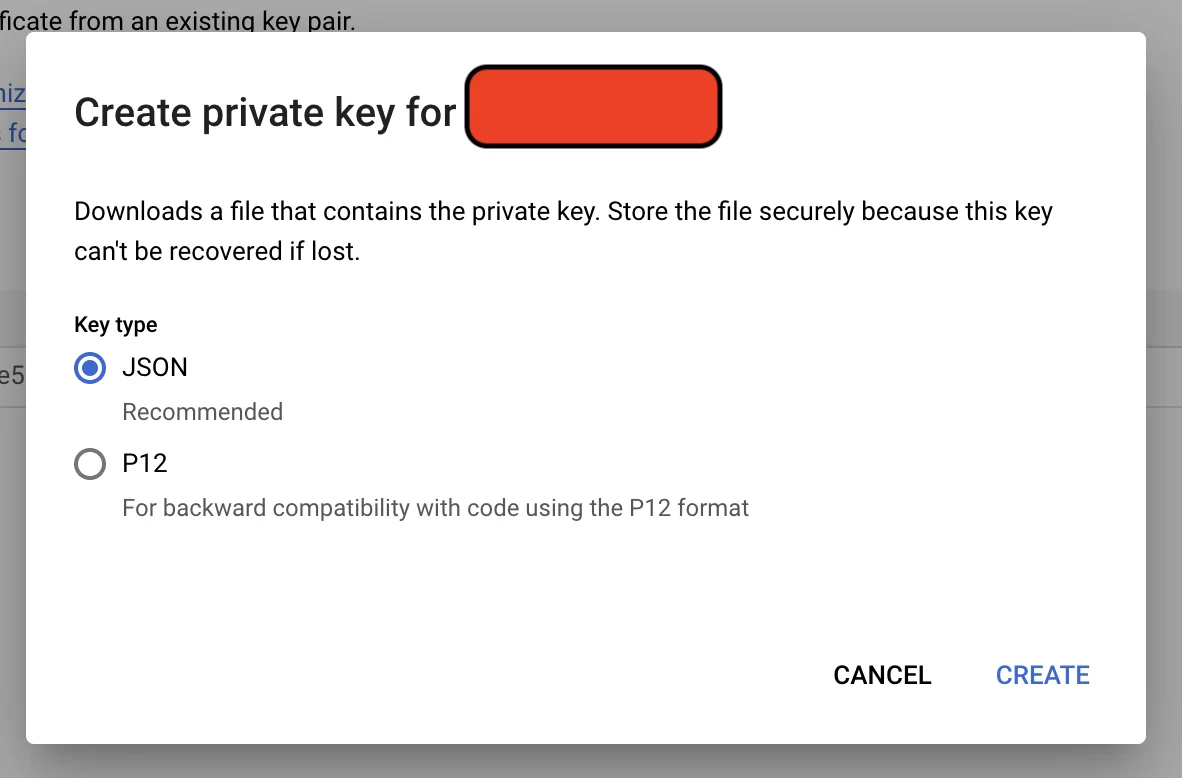
Then generate & download key in json format
Creating nestJs application
We will create a nestJS application, create a module to upload to upload and download files. And then we will plugin it to the controller.
We will be using nest cli to scaffold the project.
$ nest new gcp-storage
You will be asked to choose the package manager as per your linking, I prefer pnpm as its faster and takes up less space compared to npm or yarn.
Storage Module
NestJS provides an elegant way to organize your code into modules. Each module can comprise of providers, controller, services etc, you can also import/export modules/services/providers etc.
To create a module, we will navigate to gcp-storage/src.
$ nest g module storage
This command would generate nest module under src/storage.
We now create a config file storage-config.ts
const StorageConfig = {
  projectId: process.env.PROJECT_ID,
  private_key: process.env.PRIVATE_KEY,
  client_email: process.env.CLIENT_EMAIL,
  mediaBucket: process.env.STORAGE_MEDIA_BUCKET,
};

export default StorageConfig;
Also lets create a storage-file.ts to hold the file data.
export class StorageFile {
  buffer: Buffer;
  metadata: Map<string, string>;
  contentType: string;
}
Storage Service
Let us create a service which will be responsible for uploading and downloading file from storage bucket. To do this we will again use nest cli at location src.
$ nest g service storage
This command will create a storage.service.ts at src/storage. I will also annotate the class with @Injectable() and will add reference to ServiceModule. Additionally, we will also export the StorageService from module, as we will be using StorageService in other modules.
So our StorageModule class will look like this.
import { Module } from "@nestjs/common";
import { StorageService } from "./storage.service";

@Module({
  providers: [StorageService],
  exports: [StorageService],
})
export class StorageModule {}
Let’s get back to our storage service. In the constructor we will initialize Storage object with projectId & credentials.
import { StorageFile } from "./storage-file";
import { DownloadResponse, Storage } from "@google-cloud/storage";
import { Injectable } from "@nestjs/common";
import StorageConfig from "./storage-config";

@Injectable()
export class StorageService {
  private storage: Storage;
  private bucket: string;

  constructor() {
    this.storage = new Storage({
      projectId: StorageConfig.projectId,
      credentials: {
        client_email: StorageConfig.client_email,
        private_key: StorageConfig.private_key,
      },
    });

    this.bucket = StorageConfig.mediaBucket;
  }

  async save(
    path: string,
    contentType: string,
    media: Buffer,
    metadata: { [key: string]: string }[]
  ) {
    const object = metadata.reduce((obj, item) => Object.assign(obj, item), {});
    const file = this.storage.bucket(this.bucket).file(path);
    const stream = file.createWriteStream();
    stream.on("finish", async () => {
      return await file.setMetadata({
        metadata: object,
      });
    });
    stream.end(media);
  }

  async delete(path: string) {
    await this.storage
      .bucket(this.bucket)
      .file(path)
      .delete({ ignoreNotFound: true });
  }

  async get(path: string): Promise<StorageFile> {
    const fileResponse: DownloadResponse = await this.storage
      .bucket(this.bucket)
      .file(path)
      .download();
    const [buffer] = fileResponse;
    const storageFile = new StorageFile();
    storageFile.buffer = buffer;
    storageFile.metadata = new Map<string, string>();
    return storageFile;
  }

  async getWithMetaData(path: string): Promise<StorageFile> {
    const [metadata] = await this.storage
      .bucket(this.bucket)
      .file(path)
      .getMetadata();
    const fileResponse: DownloadResponse = await this.storage
      .bucket(this.bucket)
      .file(path)
      .download();
    const [buffer] = fileResponse;

    const storageFile = new StorageFile();
    storageFile.buffer = buffer;
    storageFile.metadata = new Map<string, string>(
      Object.entries(metadata || {})
    );
    storageFile.contentType = storageFile.metadata.get("contentType");
    return storageFile;
  }
}
In the save method, we are creating the writeStream to upload the file to the bucket. On upload we are also updating metadata information.
There are two different implementation of get method, with & without metadata information.
Now that we have our service ready lets add a controller in the main module.
Media Module
I will create a separate media module to which I will inject the storage service we created.
Again to generate module, I will goto src folder.
$ nest g module media

CREATE media/media.module.ts (82 bytes)
UPDATE app.module.ts (385 bytes)
To expose the endpoint, I will also need a nestjs controller, so we will again use the nest cli to generate controller.
$ nest g controller media

CREATE media/media.controller.spec.ts (485 bytes)
CREATE media/media.controller.ts (99 bytes)
UPDATE media/media.module.ts (170 bytes)
This command will generate a controller and also update the media module.
Importing Storage module
In order to use StorageService within MediaModule we will have to import the StorageModule. So let’s update our media/media.module.ts
import { Module } from "@nestjs/common";
import { StorageModule } from "src/storage/storage.module";
import { MediaController } from "./media.controller";

@Module({
  imports: [StorageModule],
  controllers: [MediaController],
})
export class MediaModule {}
Also, remember we had already exported the StorageService in StorageModule, so now once we import the module all the exported providers will now be accessible in the current module.
Media Controller
To handle file uploading, Nest provides a built-in module based on the multer middleware package for Express. Multer handles data posted in the multipart/form-data format, which is primarily used for uploading files via an HTTP POST request. This module is fully configurable and you can adjust its behavior to your application requirements.
For better type safety, let’s install Multer typings package
$ pnpm i -D @types/multer
With this package installed, we can now use the Express.Multer.File type (you can import this type as follows: import { Express } from ‘express’).
Now we create the upload method in controller.
import {
  Body,
  Controller,
  Get,
  NotFoundException,
  Param,
  Post,
  Res,
  ServiceUnavailableException,
  UploadedFile,
  UseInterceptors,
} from "@nestjs/common";
import { FileInterceptor } from "@nestjs/platform-express";
import { Response } from "express";
import { StorageFile } from "src/storage/storage-file";
import { StorageService } from "src/storage/storage.service";

@Controller("media")
export class MediaController {
  constructor(private storageService: StorageService) {}

  @Post()
  @UseInterceptors(
    FileInterceptor("file", {
      limits: {
        files: 1,
        fileSize: 1024 * 1024,
      },
    })
  )
  async uploadMedia(
    @UploadedFile() file: Express.Multer.File,
    @Body("mediaId") mediaId: string
  ) {
    await this.storageService.save(
      "media/" + mediaId,
      file.mimetype,
      file.buffer,
      [{ mediaId: mediaId }]
    );
  }

  @Get("/:mediaId")
  async downloadMedia(@Param("mediaId") mediaId: string, @Res() res: Response) {
    let storageFile: StorageFile;
    try {
      storageFile = await this.storageService.get("media/" + mediaId);
    } catch (e) {
      if (e.message.toString().includes("No such object")) {
        throw new NotFoundException("image not found");
      } else {
        throw new ServiceUnavailableException("internal error");
      }
    }
    res.setHeader("Content-Type", storageFile.contentType);
    res.setHeader("Cache-Control", "max-age=60d");
    res.end(storageFile.buffer);
  }
}
In the upload method we are using FileInterceptors to restrict the file size and number of files to be uploaded.
Working with .env files
Only one thing remaining to set the environment variables which is being used by StorageConfig.
We will first add env-cmd & dotenv packages.
$ pnpm install -D env-cmd dotenv
Now we change the package.json file and modify the start:dev script command.
"start:dev": "env-cmd -f .env nest start --watch",
Finally we create .env file in the project folder.
PROJECT_ID = <YOUR_PROJECT_ID>
PRIVATE_KEY = <YOUR_SERVICE_ACCOUNT_PRIVATE_KEY>
CLIENT_EMAIL = <YOUR_SERVICE_ACCOUNT_EMAIL>
STORAGE_MEDIA_BUCKET = <YOUR_BUCKET_NAME>
And there you have it. A working nest application to upload and download files. You can download the source code from github.
If you liked this article, you can buy me a coffee
Leave a comment