Coming from the Java background, I was always troubled when using javascript. To my rescue came the typescript, it was easy to co-relate and write structured code. At the same time, I had to write a lot of boilerplate code to follow SOLID principles.
I started to look for js framework which would simplify these things. After going through a lot of alternatives, I landed to NestJS.
What is NestJs?
NestJs is a nodeJs frameworks to build scalable and efficient microservices.
NestJs draws a lot of inspiration from Angular framework, it focuses on writing modular codes. I would say, similar to Angular, it is highly opinionated on how to organize and structure your code.
It leverages typescript to have statically typed code compilation (though you can write your code javascript as well). NextJS is basically a framework over express, so what the need of having a framework over framework, well, express is good, but it is quite verbose and does not solve the problem of - Architecture
NestJs focus on clean code practices, it enables you to create fast, writing highly testable, scalable & loosely coupled system, which in longer run are easy to maintain.
Installation
NestJs provides CLI which can be used to generate scaffolding the project or generate modules. services, resources etc.
You simply need node to get started. Just type the below command to install the CLI, then use the nest command to create new project
$ npm i -g @nestjs/cli
$ nest new project-name
Now go your project and start the project and get started.
$ cd project-name
$ npm run start
Now you can access the services at http://localhost:3000/
NestJS Module, controller and service
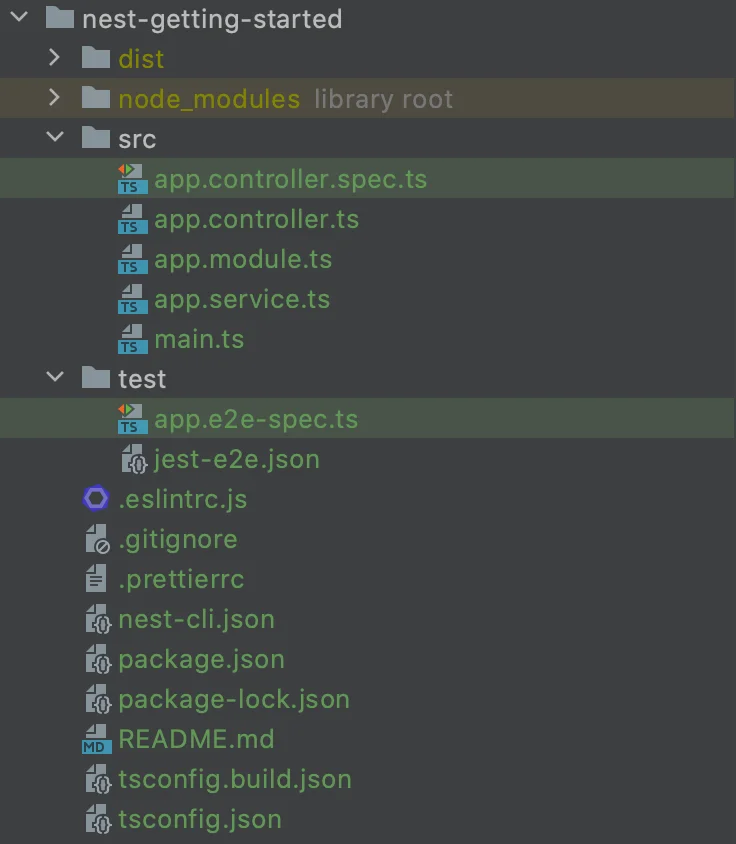
Before we proceed, look at the files generated.

It creates all the support files & src folder which contains your app.
NestJs doesn’t read all the files, it just looks at files supplied in module/services.
The starting for point for any NestJs application in main.ts in the src folder.
import { NestFactory } from '@nestjs/core';
import { AppModule } from './app.module';

async function bootstrap() {
  const app = await NestFactory.create(AppModule);
 await app.listen(3000);
}
bootstrap();
We use NestFactory to create AppModule which initializes the application.
Let’s take a look at AppModule. It’s a simple typescript class with @Module class decorator, it defines which modules are imported, defines the controllers (responsible for rest calls) & providers (define services).
@Module({
 imports: [],
 controllers: [AppController],
 providers: [AppService],
})
export class AppModule {}
Nest cli also generates a sample a controller & service. Nest has abstracted routing/http calls via decorators, so creating new endpoints is super easy. All you need to do is to use @Controller(<PATH>) on the class and then use Nest decorator for HTTP requests eg. @Get(), @Post(), @Put() @Delete() etc on your method.
import { Controller, Get } from '@nestjs/common';
import { AppService } from './app.service';

@Controller()
export class AppController {
  constructor(private readonly appService: AppService) {}

  @Get()
  getHello(): string {
    return this.appService.getHello();
  }
}
If you see here, we are passing AppService in constructor. When the application initializes Nest injects the AppService into this controller. The only thing we need to make sure that the AppService class is marked with @Injectable().
import { Injectable } from '@nestjs/common';

@Injectable()
export class AppService {
  getHello(): string {
    return 'Hello World!';
 }
}
To sum up, here are some of the pros & cons of using NestJS.
Pros:
- Highly structured
- Testable
- Dependency Injection
- Modular
- You can switch between express & fastify without affecting your controllers
- Very less boilerplate code
- High maintainability
Cons:
- Highly opinionated on how the code should be structured.
- Learning curve
I found it really easy to get started, hope you also find it interesting.
If you liked this article, you can buy me a coffee
Leave a comment