Event Driven Microservices with Spring Cloud Stream Using Rabbitmq
In today’s world microservices has taken the software industry by storm, the reason is obvious, it provides loose coupling, microservices are more reliable and scalable compared to monolith applications. You can introduce new components in the workflow without breaking another, and you can still interact with your legacy applications.
But life is not fair, so microservices comes with their own set of challenges. One of the most important of them is how would these microservices should interact with each other. Should they be using rest endpoint’s (but services fail if requested point is not available), or using messaging but configuring a broker is a pain. What if I designed my application to use rabbitmq but now I want to migrate to AWS kinesis, there is a lot of pain involved in migrating tech stack.
Spring Cloud Stream
Spring has come up with an abstraction over messaging infrastructure, to make sure, we focus more on business goals rather than technology management. And the solution is Spring Cloud Stream.
Spring Cloud Stream(SCS) is build over spring boot and is highly opinionated about the runtime configuration.
Spring Integration
Spring Cloud Stream uses spring-integration to provide connectivity to message brokers. It uses the concept of MessageChannel to decouples message producers from message consumers.
It also provides the Channel Adapters, which takes in outside message and adapts them to spring message.
There are Service Activators, which are responsible for pulling messages from message channel and call the attached method of service bean.
Basic Concepts
When we are taking about Cloud Streams, there are some basic concepts that we need to remember:
- Apps are going to communicate with each other via channels.
- All the middleware will be abstracted by Binders, it the job of the binder to how to connect with the physical endpoints like queues, topics etc. Spring Cloud Stream auto detects the binders based on the classpath, and configures them. You can create multiple brokers of the same type, even you can configure multiple binders e.g. Kafka or Rabbitmq to send the same message on different channels.
- Cloud Streams provide @StreamListener to pull objects from message channel. You can create multiple conditional listeners.
Spring Cloud Communication patterns
Spring Cloud Stream uses 3 different patterns to communicate over channels.
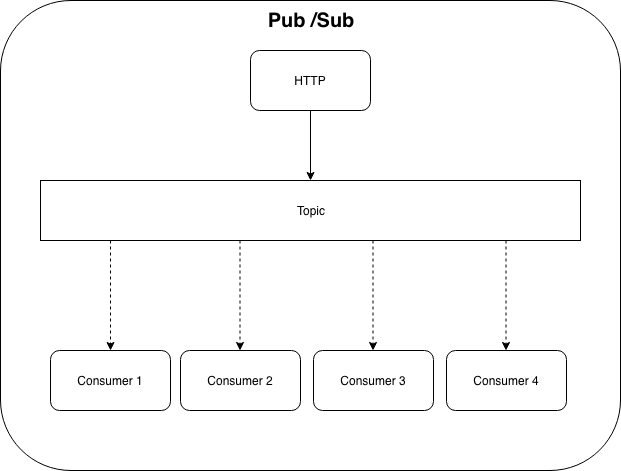
- Publisher/Subscriber: Message is broadcast, all the listeners will be notified.

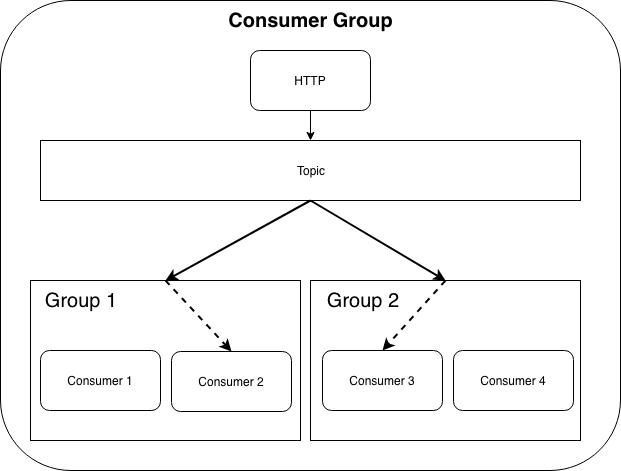
- Consumer Groups: This concept was introduced by Kafka for the first time. Here the message will be broadcast, but now the consumer are divided in groups, each group will receive the message, but only one of the consumer will process it. You don’t need to have Kafka, SCS provides wrapper logic to manage consumer groups internally.
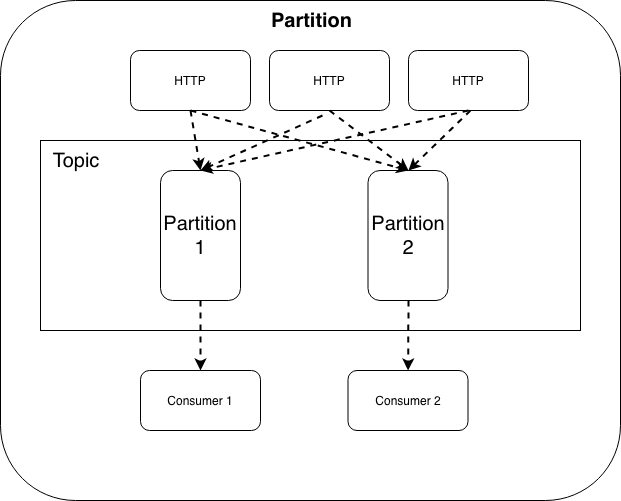
- Partitioning: This is a very strong feature provided by SCS, you can send the message and consumer will be partitioned based on the condition. so each partition will be handling the respective data independently.
Setting up RabbitMQ
We are going to use RabbitMQ as our binging channel, we are going to run rabbitMQ inside docker container.
User the following command to run docker instance.
$ docker run -d --hostname my-rabbit --name some-rabbit -p 15672:15672 -p 5672:5672 rabbitmq:3-management
Unable to find image 'rabbitmq:3-management' locally
3-management: Pulling from library/rabbitmq
5b7339215d1d: Pull complete
14ca88e9f672: Pull complete
a31c3b1caad4: Pull complete
b054a26005b7: Pull complete
eef17c6cb6cf: Pull complete
2f1b018e55d1: Downloading [========================>                          ]  16.64MB/34.14MB
6cb106540743: Download complete
88b93ace2192: Download complete
609cd90dbc7b: Download complete
c9ee32f1144b: Download complete
fefc85bff58e: Download complete
33624b12c0ed: Downloading [===================>                               ]  4.021MB/10.14MB
Digest: sha256:a8c1e0f2cea371b4860df47a53294876d6874fe68fa12c416e39cef307e75bcd
Status: Downloaded newer image for rabbitmq:3-management
fa09ea9000b27817fd22bcb623d2e844c892e22d1b9eedd22402abe19344b9b9
Once the download is complete, it would fire up the container. To verify your container is up:
$ docker ps

CONTAINER ID        IMAGE                   COMMAND                  CREATED             STATUS              PORTS                                                                    NAMES
fa09ea9000b2        rabbitmq:3-management   "docker-entrypoint.s…"   2 minutes ago       Up 2 minutes        4369/tcp, 5671-5672/tcp, 15671/tcp, 25672/tcp, 0.0.0.0:8080->15672/tcp   some-rabbit
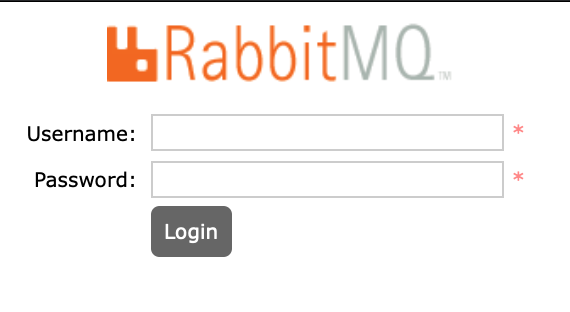
To access the rabbitMQ console login to http://localhost:15672/. which is available on the standard management port of 15672, with the default username and password of guest / guest
After login the console is available:

Problem statement
Before we proceed let’s create a problem statement we are trying to solve with messaging. Assume we have an Online Order service, when someone places the order, we log the orders for auditing, send the order for packaging. We have an independent logging system and now we need to connect our main application logging system.
Application
Now we will create a spring boot application and add the following dependencies:
        <dependency>
            <groupId>org.springframework.cloud</groupId>
            <artifactId>spring-cloud-stream</artifactId>
        </dependency>
        <dependency>
            <groupId>org.springframework.cloud</groupId>
            <artifactId>spring-cloud-stream-binder-rabbit</artifactId>
        </dependency>
we will also need to add bom import
    <dependencyManagement>
        <dependencies>
            <dependency>
                <groupId>org.springframework.cloud</groupId>
                <artifactId>spring-cloud-dependencies</artifactId>
                <version>Greenwich.RELEASE</version>
                <type>pom</type>
                <scope>import</scope>
            </dependency>
        </dependencies>
    </dependencyManagement>
Since we have given binder for rabbitmq, spring cloud will autoconfigure the binding.
Let’s initialize rabbitmq connection details, add the following lines in your application.properties file.
spring.rabbitmq.host=127.0.0.1
spring.rabbitmq.port=5672
spring.rabbitmq.username=guest
spring.rabbitmq.password=guest
Next step is to define channels through which we want to communicate, Spring has provided 3 types of channel out of the box(we will be using mostly custom channels in prod, but for this article we will stick to provided channel).
-
Sink: Consumer binding
public interface Sink { String INPUT = "input"; @Input(Sink.INPUT) SubscribableChannel input(); } - Source: Producer binding
public interface Source { String OUTPUT = "output"; @Output(Source.OUTPUT) MessageChannel output(); } - Processor: combination of Sink & Source, consumes message & also produces it.
public interface Processor extends Source, Sink {}
In our sample application we produce one event every 5 seconds with a spring Scheduler.
Enable Scheduling:
@SpringBootApplication
@EnableScheduling
public class SpringCloudStreamRabbitmqPubApplication {

    public static void main(String[] args) {
        SpringApplication.run(SpringCloudStreamRabbitmqPubApplication.class, args);
    }

}
we will create a payload class, in this case:
public class Order {

    private String orderNumber;

    // getter  and setters ...
}
Publisher
Now we create an order service to produce orders every 5 sec.
@Component
@EnableBinding(Source.class)
public class OrderPublisher {

    @Autowired Source source;

    @Scheduled(fixedDelay = 5000)
    public void publishOrder() {
        final Message<Order> message = MessageBuilder.withPayload(new Order("Order Number: " + System.currentTimeMillis())).build();
        source.output().send(message);
    }

    public static class Order {
        private LocalDateTime localDateTime;

        public Order(final LocalDateTime localDateTime) {
            this.localDateTime = localDateTime;
        }

        public LocalDateTime getLocalDateTime() {
            return localDateTime;
        }
    }
}
At line 2, we used @EnableBinding and provided Source channel, then we autowired Source to publish message to channel. We have used @Scheduled to execute method every 5 sec.
Now when we run the application we can verify if our message is getting published in rabbitmq, let’s check its management console.
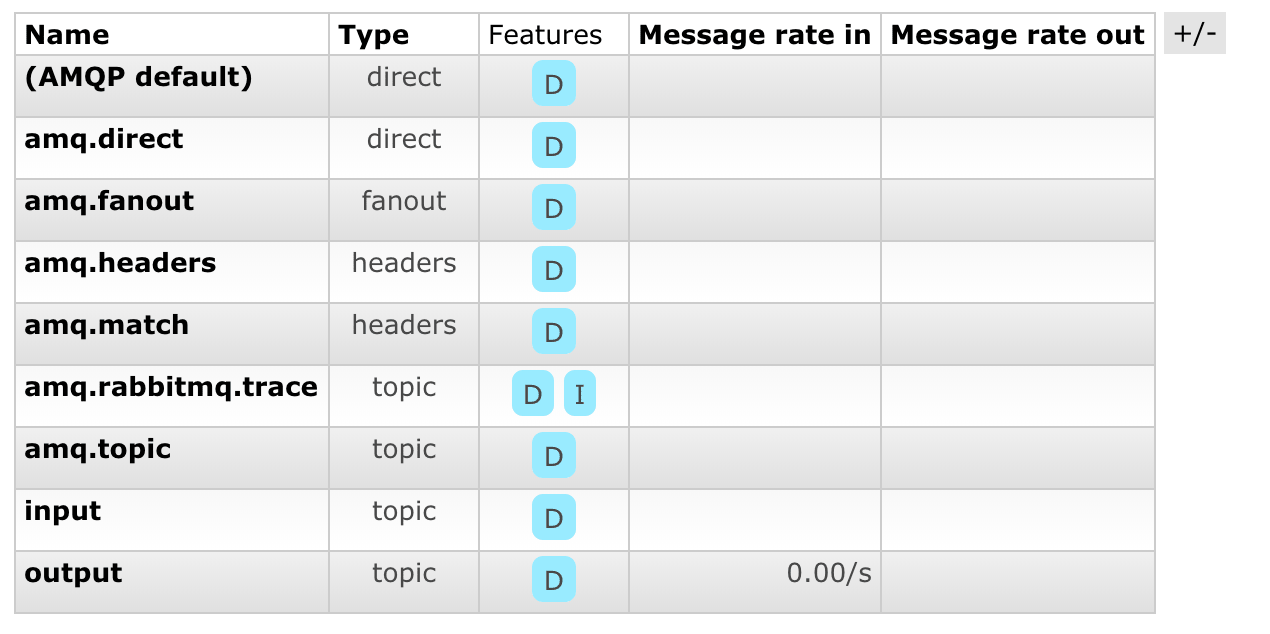
We can notice a new topic has been created in Exchanges with the name output to match the interface.
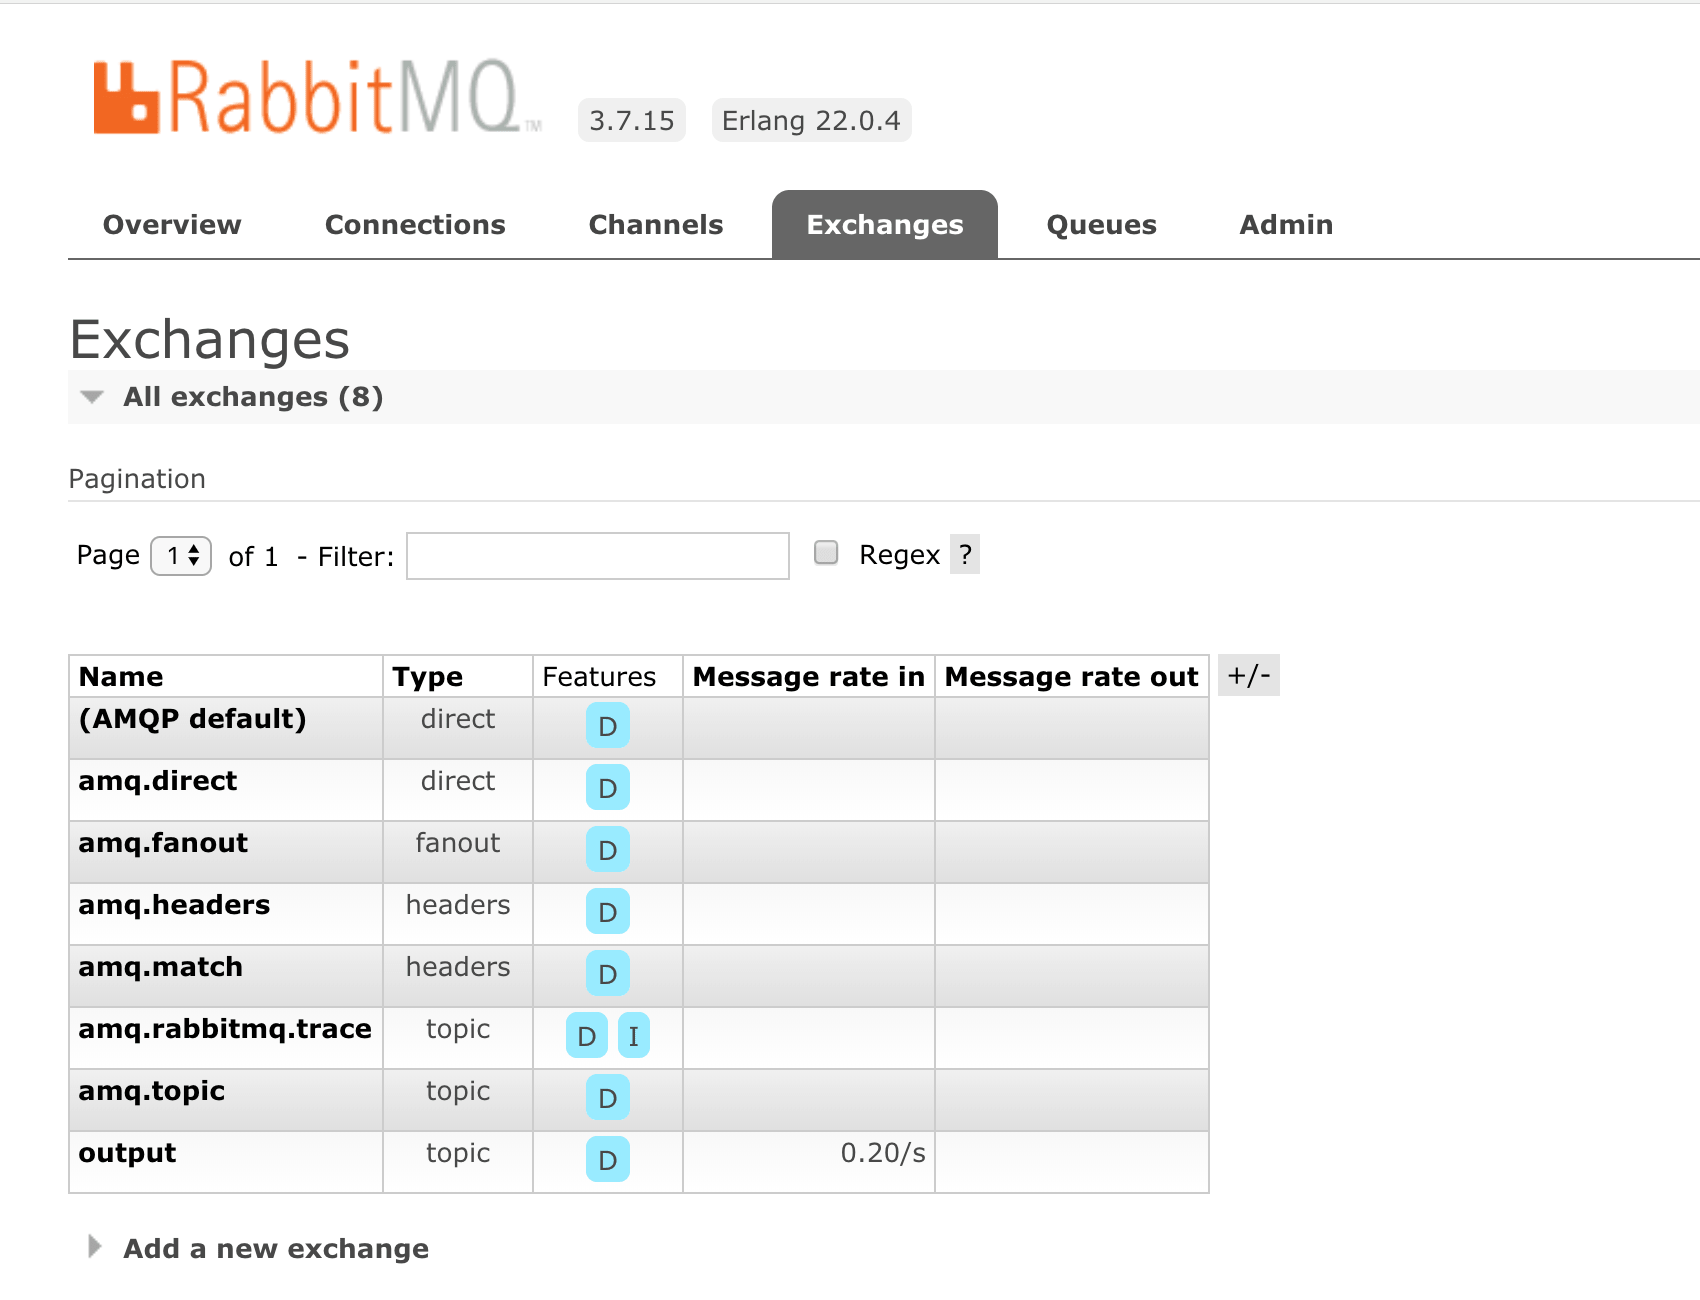
And we can see a message being published to the newly create output topic.
Consumer
Now lets create a logging listener which will receive the message.
import org.springframework.cloud.stream.annotation.EnableBinding;
import org.springframework.cloud.stream.annotation.StreamListener;
import org.springframework.cloud.stream.messaging.Sink;
import org.springframework.messaging.Message;
import org.springframework.stereotype.Component;

@Component
@EnableBinding(Sink.class)
public class LoggingListener {

    @StreamListener(Sink.INPUT)
    public void log(Message<Order> orderMessage) {
        System.out.println(orderMessage.getPayload());
    }
}
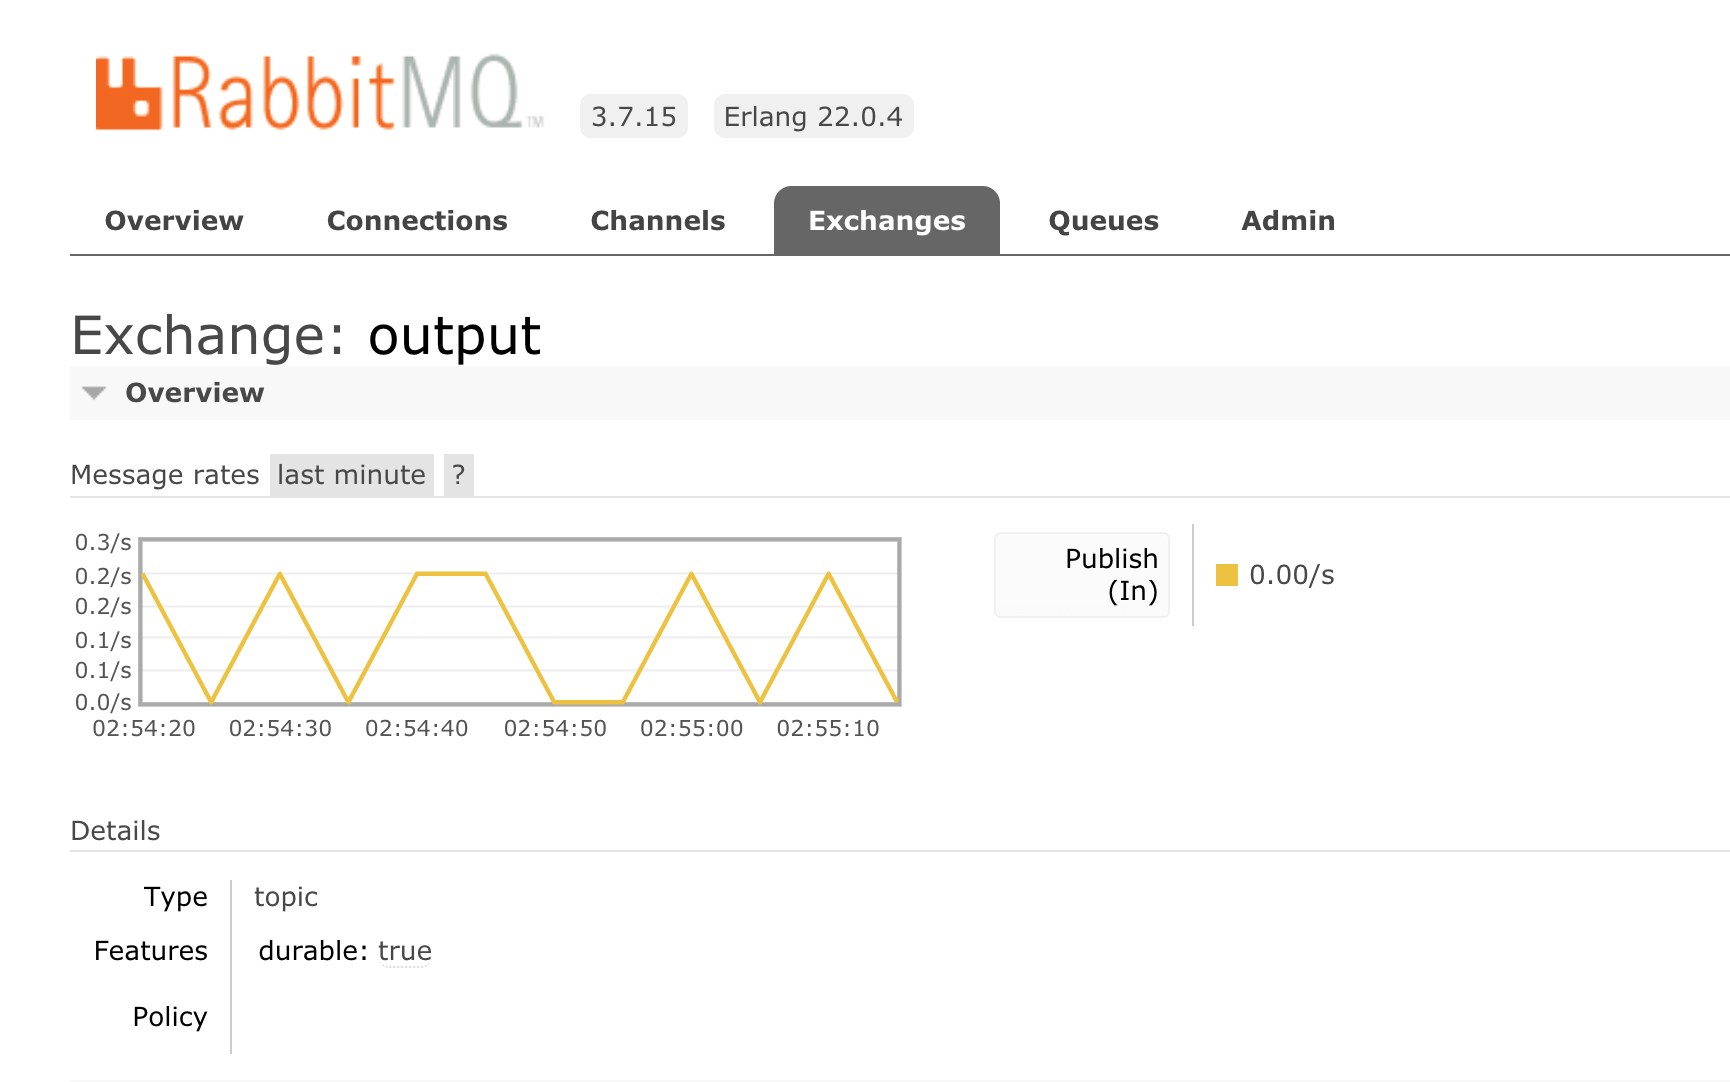
Now if we run our application again, we can see a new exchange has been added in rabbitmq
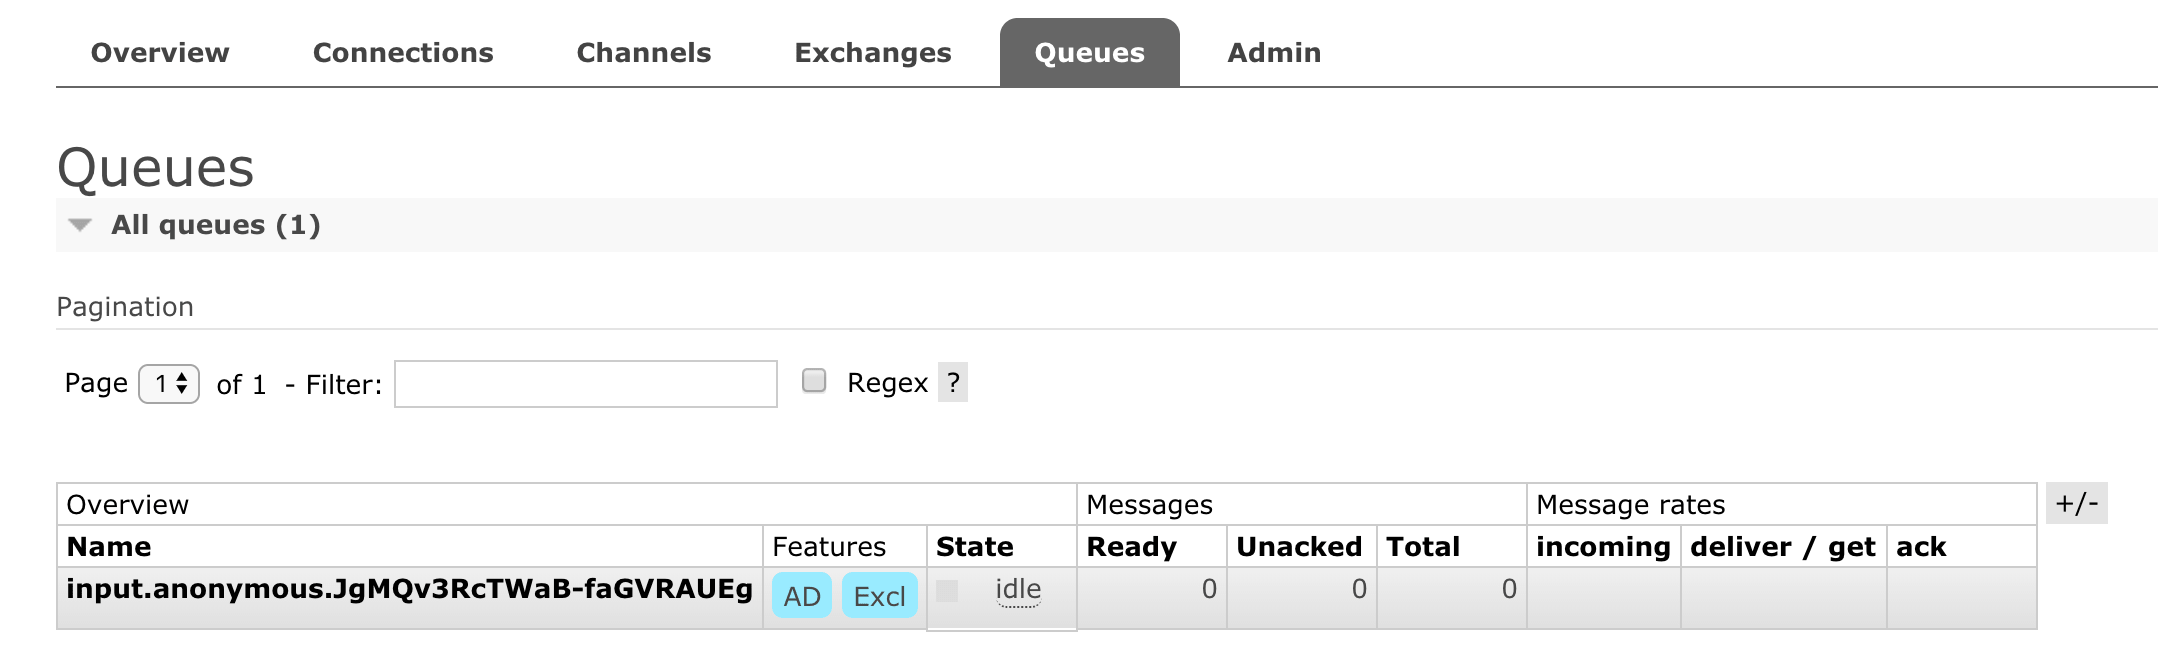
And also a queue is generated something like this
But we are still not receiving any message?. Ok lets see what we are missing, we have created a channel for output named as output, a channel for receiving the message named as input, but we have not attached these channels, so lets do this.
In you application.properties add the following properties.
spring.cloud.stream.bindings.input.destination=order
spring.cloud.stream.bindings.output.destination=order
We are saying both input.destination & output.destination maps to a new channel named as order
When we run the application, messages start getting printed in console.
Order Number: 1561241483425
Order Number: 1561241493487
Order Number: 1561241503487
Order Number: 1561241513490
Order Number: 1561241523494
Order Number: 1561241533496
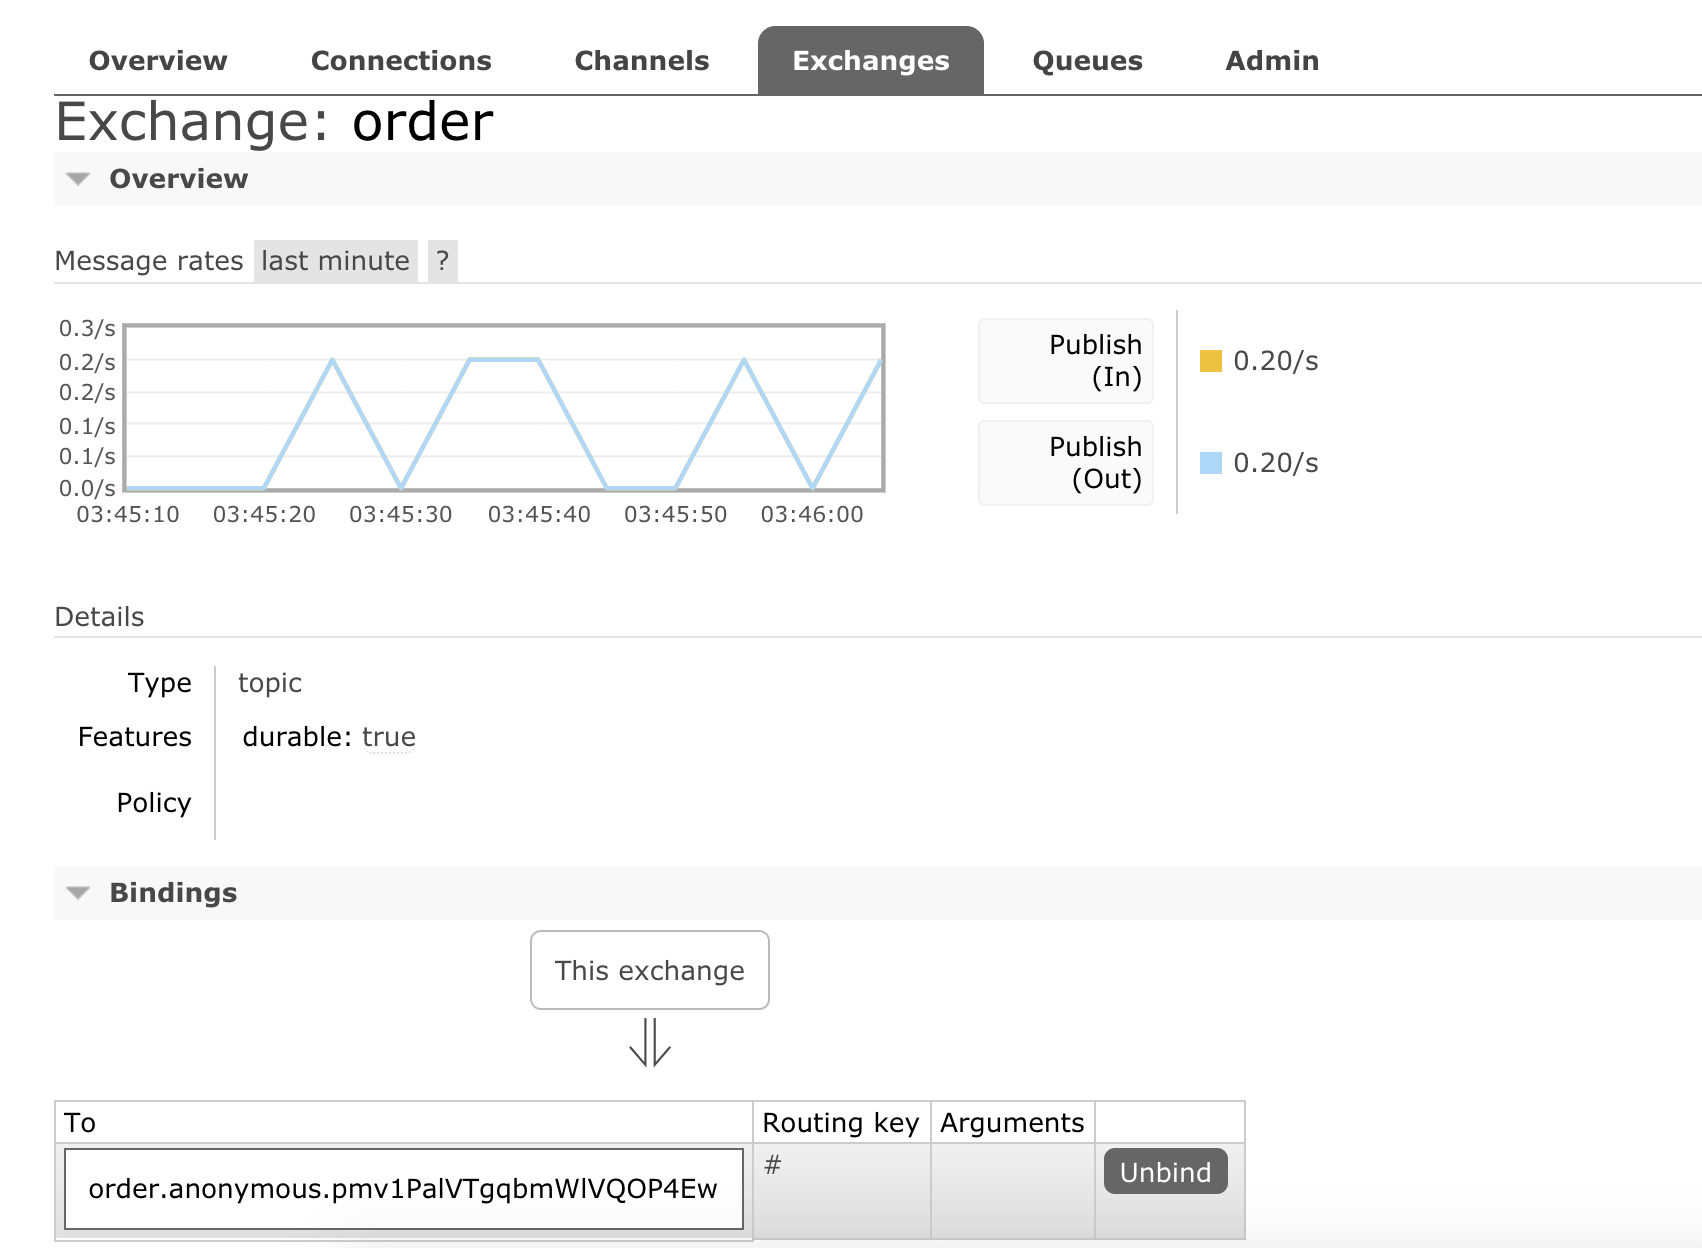
Let’s take a look at rabbitmq, if we look into order details, we see now it has a binding to order.xxxx.xxxx queue rather than input queue.
Congratulations, we have created our first spring cloud stream application.
If you liked this article, you can buy me a coffee
Leave a comment