Lets go serverless, in todays world deploying an application might just cost you cents, you can run a full fledged application for less than $1 a year if you have less traffic on your website.
When you create a simplest lambda can be created by creating a function which takes event, context, & callback params like this which returns a Hello World!.
exports.handler = (event, context, callback) => {
  callback(null, "Hello World!");
};
But it real world, each service might be having multiple endpoints. So we are going to convert our simple nest application to be aws compatible, so in this article, we will focus on deploying a nestJS app on aws lambda.
Application
To start we will create a nest application.
$ npm i -g @nestjs/cli
$ nest new nestjs-aws-lambda
Now we can run and test if our application is working.
$ cd nestjs-aws-lambda
$ npm start
Our default application is running, so lets get back to our primary goal, i.e. to convert this app to serverless.
Serverless Dependencies
There are multiple package already available to convert a node applications to aws compatible. Let install the required packages
$ npm i -S @vendia/serverless-express aws-lambda serverless
$ npm i -D @types/aws-lambda serverless-offline
Creating Handler
We will create a new file serverless.ts in our source directory.
import { NestFactory } from "@nestjs/core";
import { AppModule } from "./app.module";
import serverlessExpress from "@vendia/serverless-express";
import { Callback, Context, Handler } from "aws-lambda";

let server: Handler;

async function bootstrap() {
  const app = await NestFactory.create(AppModule);
  await app.init();

  const expressApp = app.getHttpAdapter().getInstance();
  return serverlessExpress({ app: expressApp });
}

export const handler: Handler = async (
  event: any,
  context: Context,
  callback: Callback
) => {
  server = server ?? (await bootstrap());
  return server(event, context, callback);
};
The yaml file
Now that we have created a handler function, we need to tell the lambda to find the handler method in serverless.ts file. To do this we will create a serverless.yaml
service: nest-auth

plugins:
  - serverless-offline

provider:
  name: aws
  runtime: nodejs12.x
  region: eu-west-1
  profile: default
  memorySize: 256 # optional, in MB, default is 1024
  # stage: dev

functions:
  main:
    handler: dist/serverless.handler
    events:
      - http:
          method: ANY
          path: /
      - http:
          method: ANY
          path: "{proxy+}"

custom:
  serverless-offline:
    noPrependStageInUrl: true
Running the lambda locally
There are two ways of running the application in lambda locally
- You can install
serverlessglobally bynpm install -g serverlessand then runsls offline. -
Other way is use locally installed serverless module. To do that:
-
execute command
node ./node_modules/serverless/bin/serverless.js offline -
I like to include the above command in package.json scripts.
...
...
"scripts": {
 "prebuild": "rimraf dist",
 "build": "nest build",
 "format": "prettier --write \"src/**/*.ts\" \"test/**/*.ts\"",
 "start": "nest start",
 "start:dev": "nest start --watch",
 "start:debug": "nest start --debug --watch",
 "start:prod": "node dist/main",
 "lint": "eslint \"{src,apps,libs,test}/**/*.ts\" --fix",
 "test": "jest",
 "test:watch": "jest --watch",
 "test:cov": "jest --coverage",
 "test:debug": "node --inspect-brk -r tsconfig-paths/register -r ts-node/register node_modules/.bin/jest --runInBand",
 "test:e2e": "jest --config ./test/jest-e2e.json",
 "deploy:local": "node ./node_modules/serverless/bin/serverless.js offline"
}

...
...
And now we can simply do
npm run deploy:local -
You might need to add flag to enable interop, in your tsconfig.ts, if you get an error function not found.
"esModuleInterop": true
Verify
Once the application is ready, you will see your service started locally
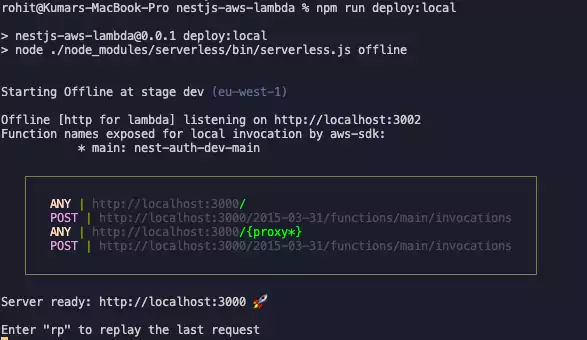
Now as we see server is listening to http://localhost:3000
Let’s do a curl to see if we can get a response from our lambda.
$ curl -i http://localhost:3000

HTTP/1.1 200 OK
x-powered-by: Express
content-type: text/html; charset=utf-8
content-length: 12
etag: W/"c-Lve95gjOVATpfV8EL5X4nxwjKHE"
cache-control: no-cache
accept-ranges: bytes
Date: Sat, 12 Feb 2022 08:57:38 GMT
Connection: keep-alive
Keep-Alive: timeout=5

Hello World!%
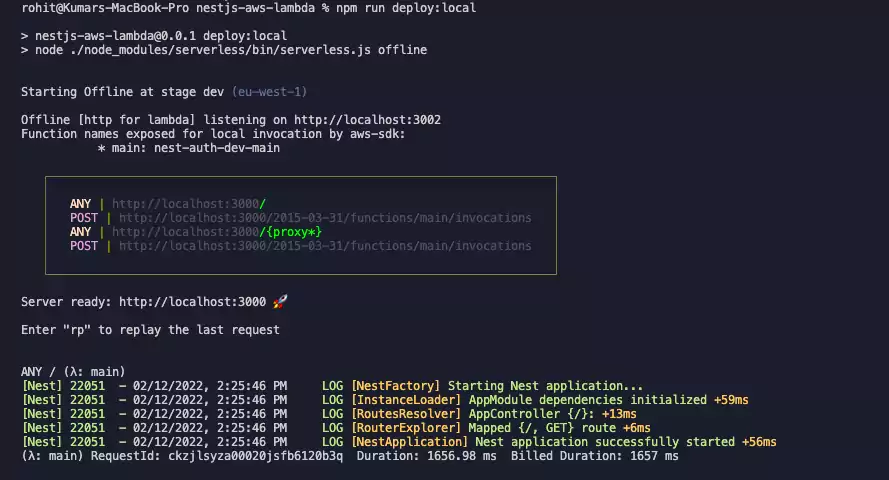
Looking at the logs we can see as soon as request is sent nest application starting up and after it completes we get a request id a duration and amount of time it will be built for once deployed to production.
Deploying
Now we can run sls deploy –-stage prod and this will package our application and upload to s3 and create all the necessary resources for us.
Once it completes we will get a api url that we can test out and use in production.

After our application is deployed we get some information and we get the endpoints here that we can use to make requests to this lambda in production.
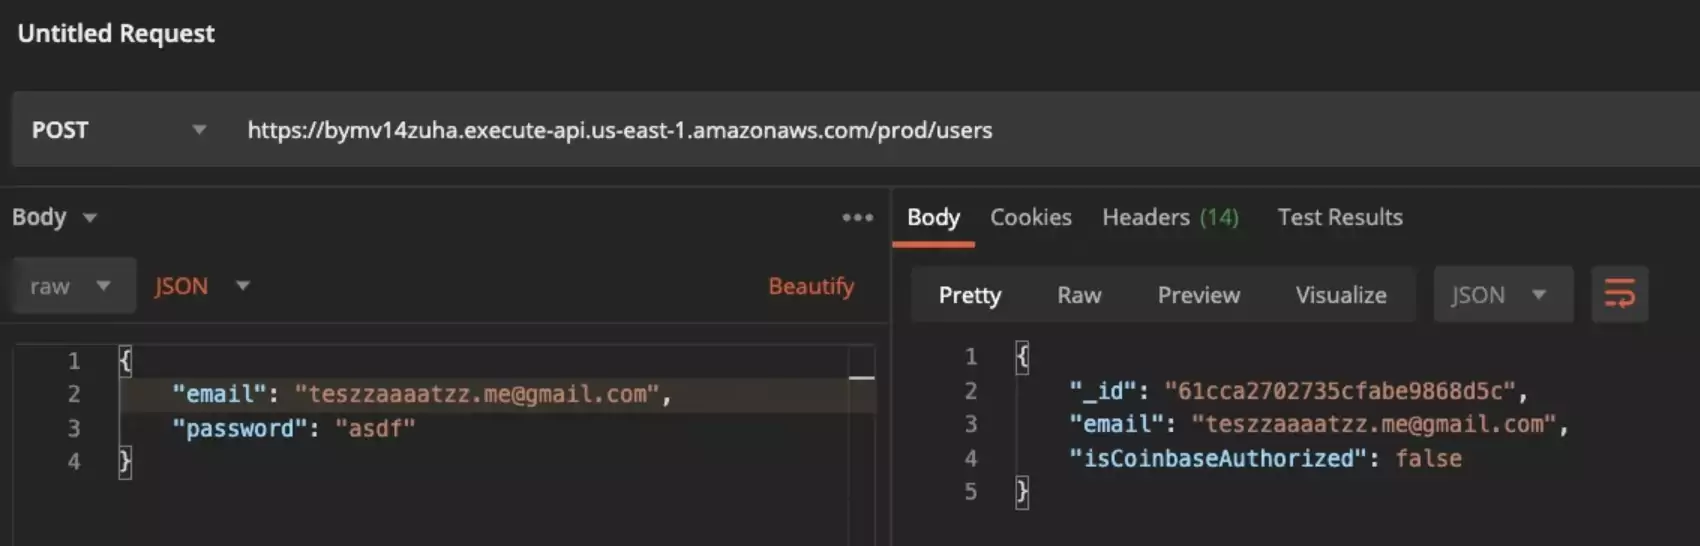
Now if we open postman and replace the url with the production url and we get a response after we created a user which is great.
And here we have nestjs serverless application running on lambda. You can find the code here.
If you liked this article, you can buy me a coffee
Leave a comment